Rak Wiseblock 4631 - nRF52840 Based Node
Description
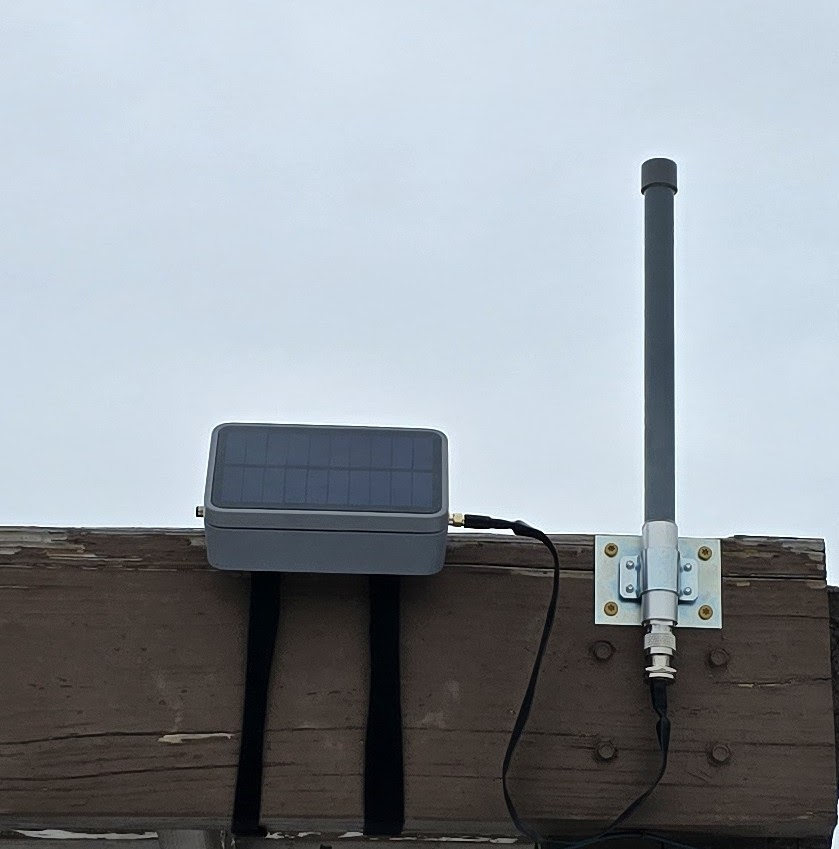
Meant for fixed location installs (Although you could add a GPS module to the Wisblock) this build kit includes an IP67 outdoor enclosure with a built in solar panel and 4dBi Omni Antenna. The Wiseblock core includes a solar charging controller and with over/under current protection built into the battery, this build results in no-solder, beginner friendly solar build without breaking the bank.
Parts List
- RAKwireless WisBlock Meshtastic Starter Kit US915 SKU 116016
- $34.97
- MakerFocus Flat 3.7V 3000mAh Rechargeable Lithium Polymer 11.1Wh Battery with JST Type PH 2.0 Plug
- $12.97
- 4 dBi N-Male Helium Hotspot Fiberglass Outdoor Antenna & Bracket Mount for RAK, Bobcat, Nebra, SenseCAP
- $19.97
- RP-SMA male to N-Female 1-pack flat window coaxial extension pigtail
Connection: RP-SMA male N-Female Bulkhead (nut and washer) 4135- $12.97
- RAK Wireless Solar Unify Enclosure Case IP67 150x100x45mm + pre-mounted M8 5 Pin + RP-SMA connector PID: 910421
- $69.97
- RAKwireless Unify Pole Mounting Vertical Kit (Type A) 910247
- $7.97
Total Cost: $158.82 + tax (free shipping from Rokland)
Building Your Node
Tools Needed
- Screwdriver
- Scissors/Side Cutters
- Drill and screws depending on how you wish to mount the antenna
- Small zip ties
- Velcro/Zip Ties/Pipe Clamps depending on how you wish to mount the enclosure
Preparation
Open all packages and ensure all components work. The Wiseblock starter kit comes pre-loaded with Meshtastic firmware but now is a good time to update it.
IMPORTANT
Check the polarity of the battery connector. The RED cable from the battery should correspond with the terminal next to the '+' symbol printed on the Wiseblock PCB. If you cross the polarity YOU WILL DAMAGE YOUR BOARD.
IMPORTANT
Do not plug in any power to the device without first attaching a LoRa Antenna. ALWAYS have a LoRa antenna connected when the device is powered on (Unless you have disabled TX within the Meshtastic Firmware). If you power on the board without a LoRa antenna connected YOU WILL DAMAGE YOUR BOARD.
Connect the included BLE and LoRa PCB antennas to the node, THEN connect USB to the node from your computer. You can update the firmware using the Meshtastic Flasher. Configure your Meshtastic settings here if you'd like.
At this stage, I'd recommend disabling TX in the Meshtastic LoRa settings until the node is fully installed. Since we will be enclosing this equipment, it makes it easier to have the solar panel and battery connected without worrying about keeping a LoRa antenna attached. Instructions to disable TX available here.
Let's Build!
- On the black plastic mounting plate use scissors or side cutters to remove the tabs marked for the Wiseblock Baseboard. Insert into the enclosure and using the included screws, fasten the Wiseblock baseboard to the mounting plate. Be sure the Wiseblock is mounted near the LoRa Antenna jumper from the enclosure.
- Using the small zip ties, secure the battery to the other half of the mounting plate in the enclosure. Be sure not to tighten so much that it damages the battery.
- Connect the BLE PCB antenna to the BLE connector on the Wiseblock module, feel free to use the adhesive backing to secure to the side of the enclosure
- Connect the LoRa Antenna jumper from the enclosure to the LoRa connector on the Wiseblock Module.
- Connect the battery plug to the BATT connector on the Wiseblock.
DOUBLE-CHECK POLARITY MATCHES WHAT IS PRINTED ON THE BOARD. - At this stage, I spread a bit of dielectric grease around the rubber gasket, but this is an optional step.
- Connect the solar plug from the lid of the enclosure to the SOLAR connector on the Wiseblock.
DOUBLE-CHECK POLARITY MATCHES WHAT IS PRINTED ON THE BOARD. - Ensure the rubber gasket is properly seated in the channel on the enclosure and close the lid. Secure the lid to the enclosure body with the provided screws. Start on a corner and snug each screw, alternating sides to ensure even clamping on the gasket (Use a "Star" pattern). Once each screw is snugged, re-tighten each screw, repeating the same pattern. No need to tighten too much here, just ensure enough camping so the gasket can seal properly.
- Alright! Your node is now connected and enclosed. Now would be a good time to ensure you can connect to the node via BLE still.
- Pick a good spot and go hang your node! The options here are endless, so I'll let you figure out the best way to secure the enclosure and antenna.
- Once your node is hung, and your ANTENNA IS CONNECTED, you can enable TX in the Meshtastic LoRa settings and enjoy the use of your node!